Originally published: 19/02/2024 08:51
Last version published: 02/12/2024 12:41
Publication number: ELQ-86920-5
View all versions & Certificate
Last version published: 02/12/2024 12:41
Publication number: ELQ-86920-5
View all versions & Certificate

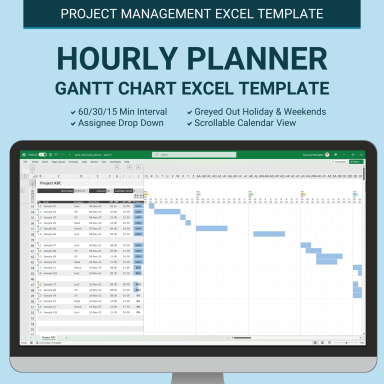
Hourly Planner Gantt Chart Excel Template, Project Management Excel Spreadsheet Template, Daily Schedule By Hour
Hourly Planner Gantt Chart Template. Visualize timelines dynamically, customize with flexible inputs, and stay organized with tailored displays.
Description
Elevate project management with this Hourly Planner Gantt Chart Template. Visualize timelines dynamically, customize with flexible inputs, and stay organized with tailored displays. Streamlined, precise, and user-friendly for optimal productivity.
❓❓ WHY Our Hourly Gantt Chart Template ❓❓
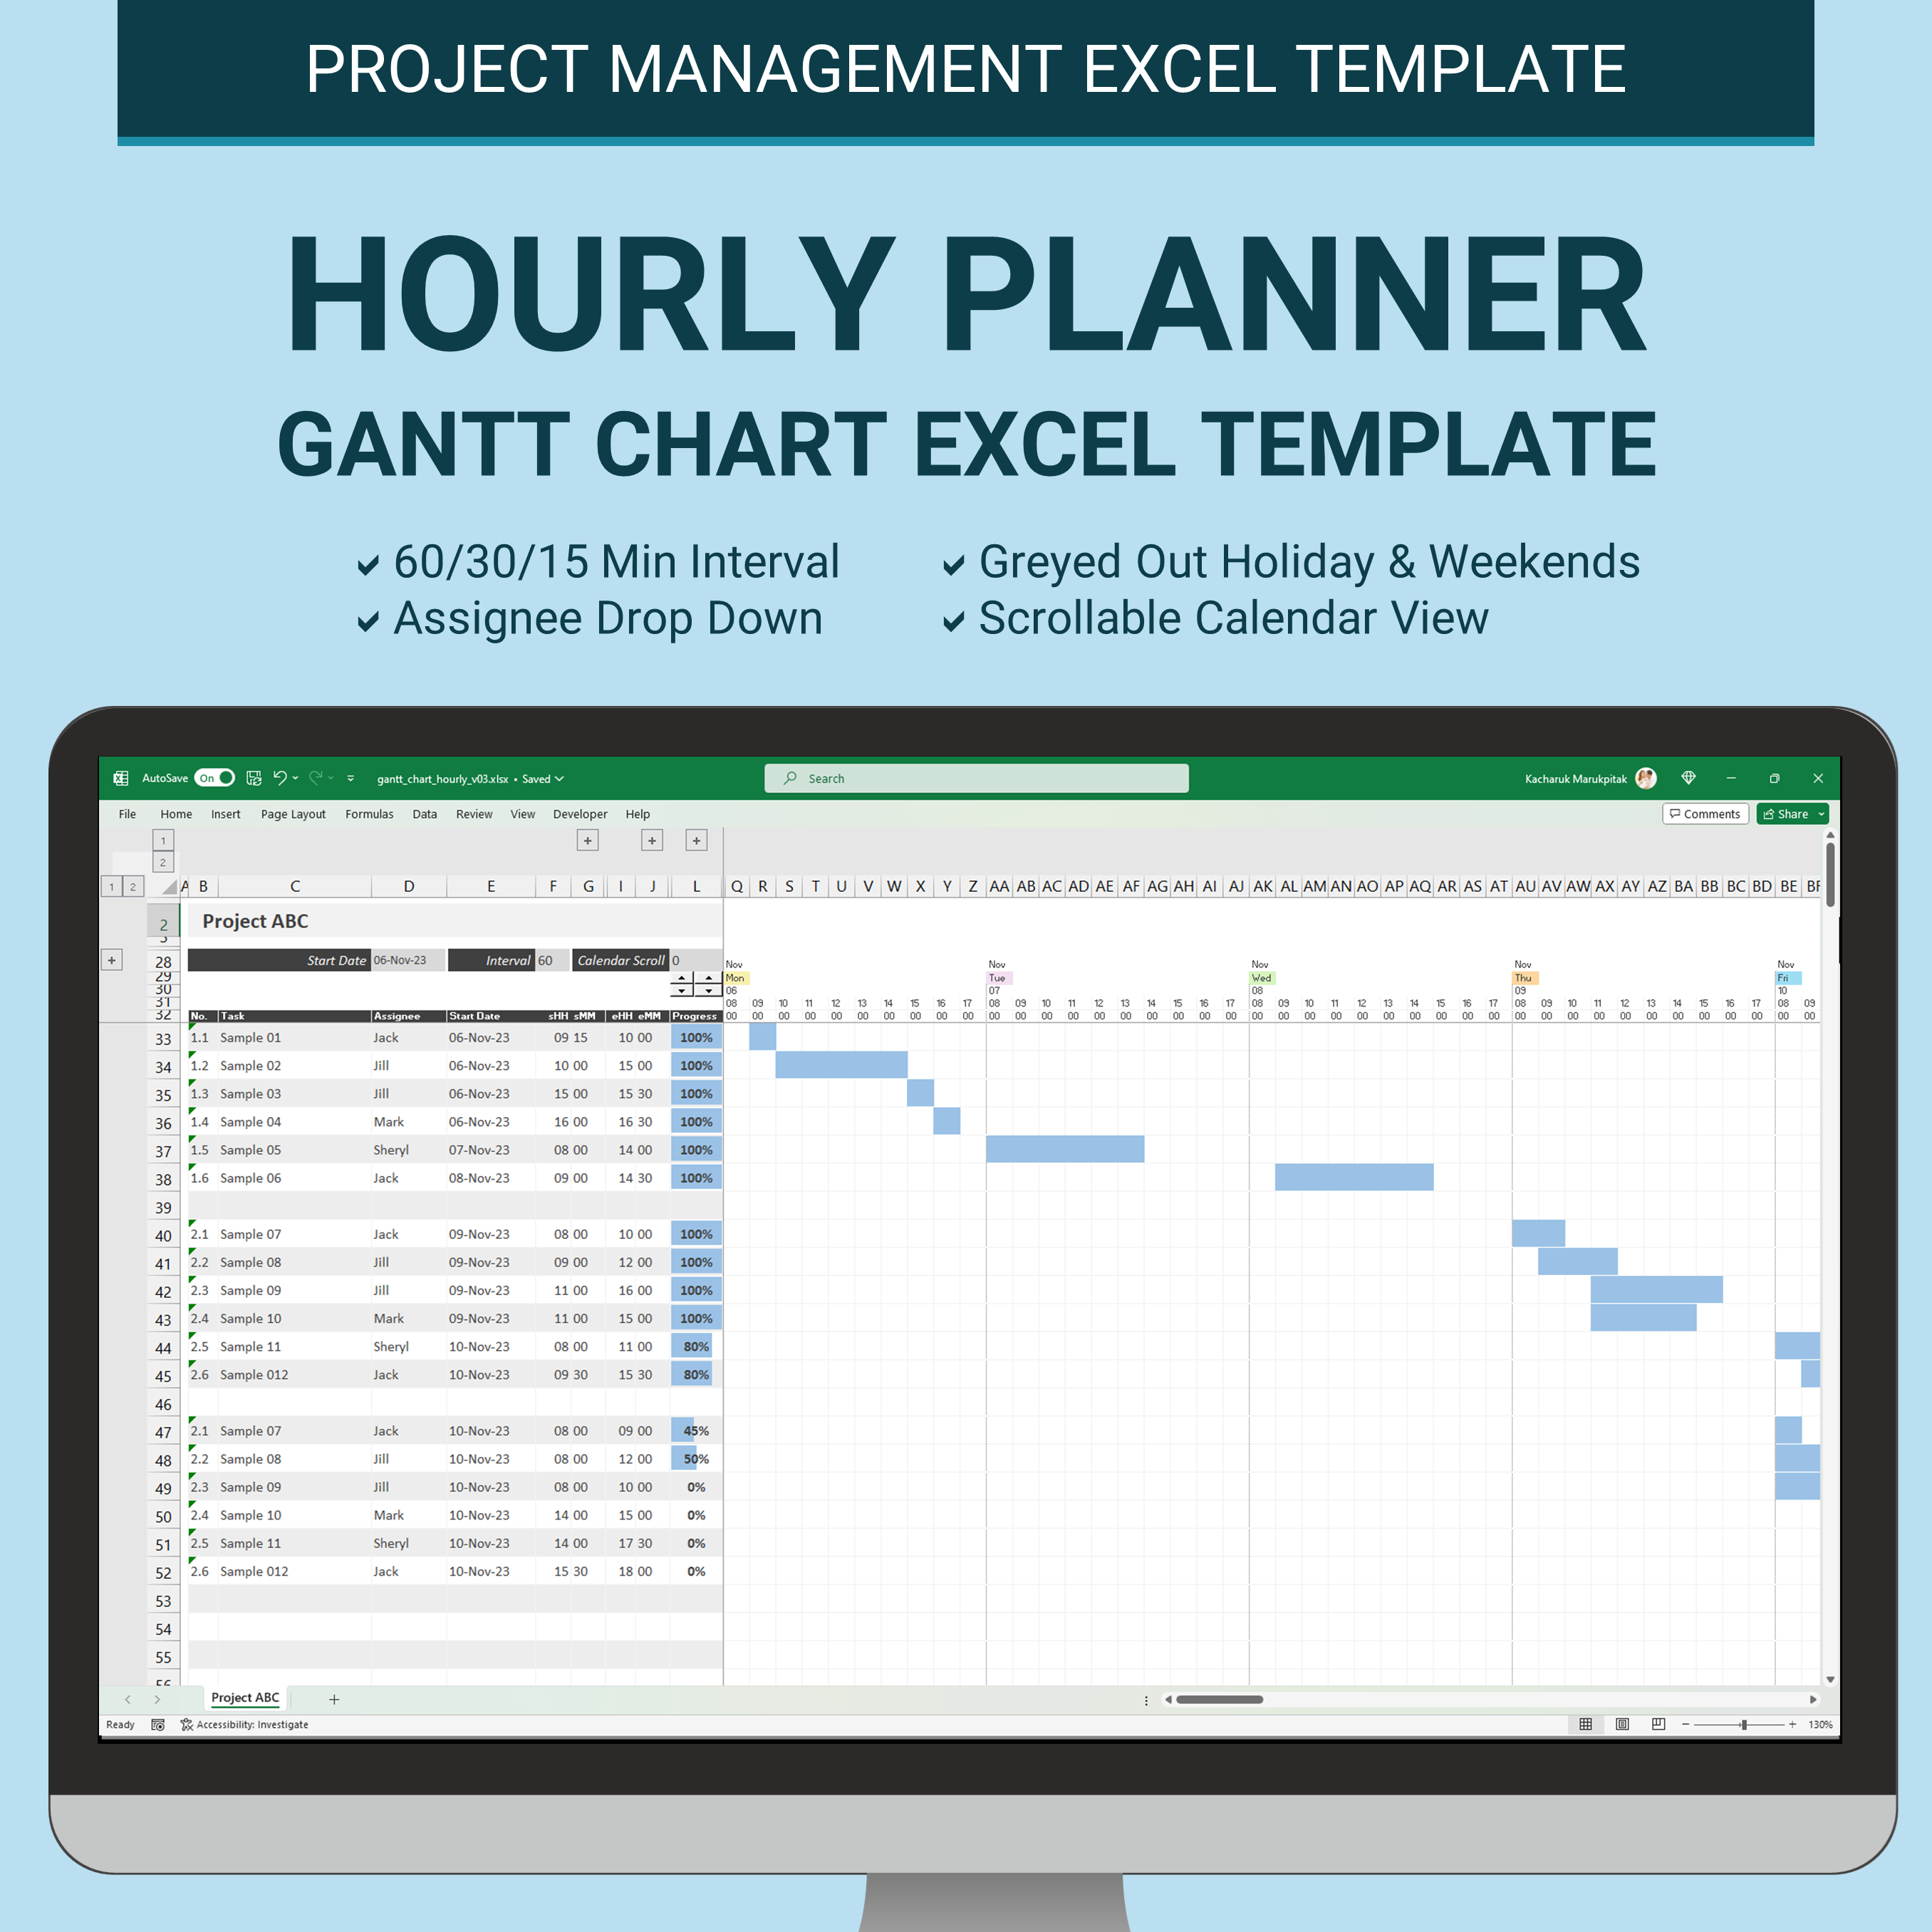
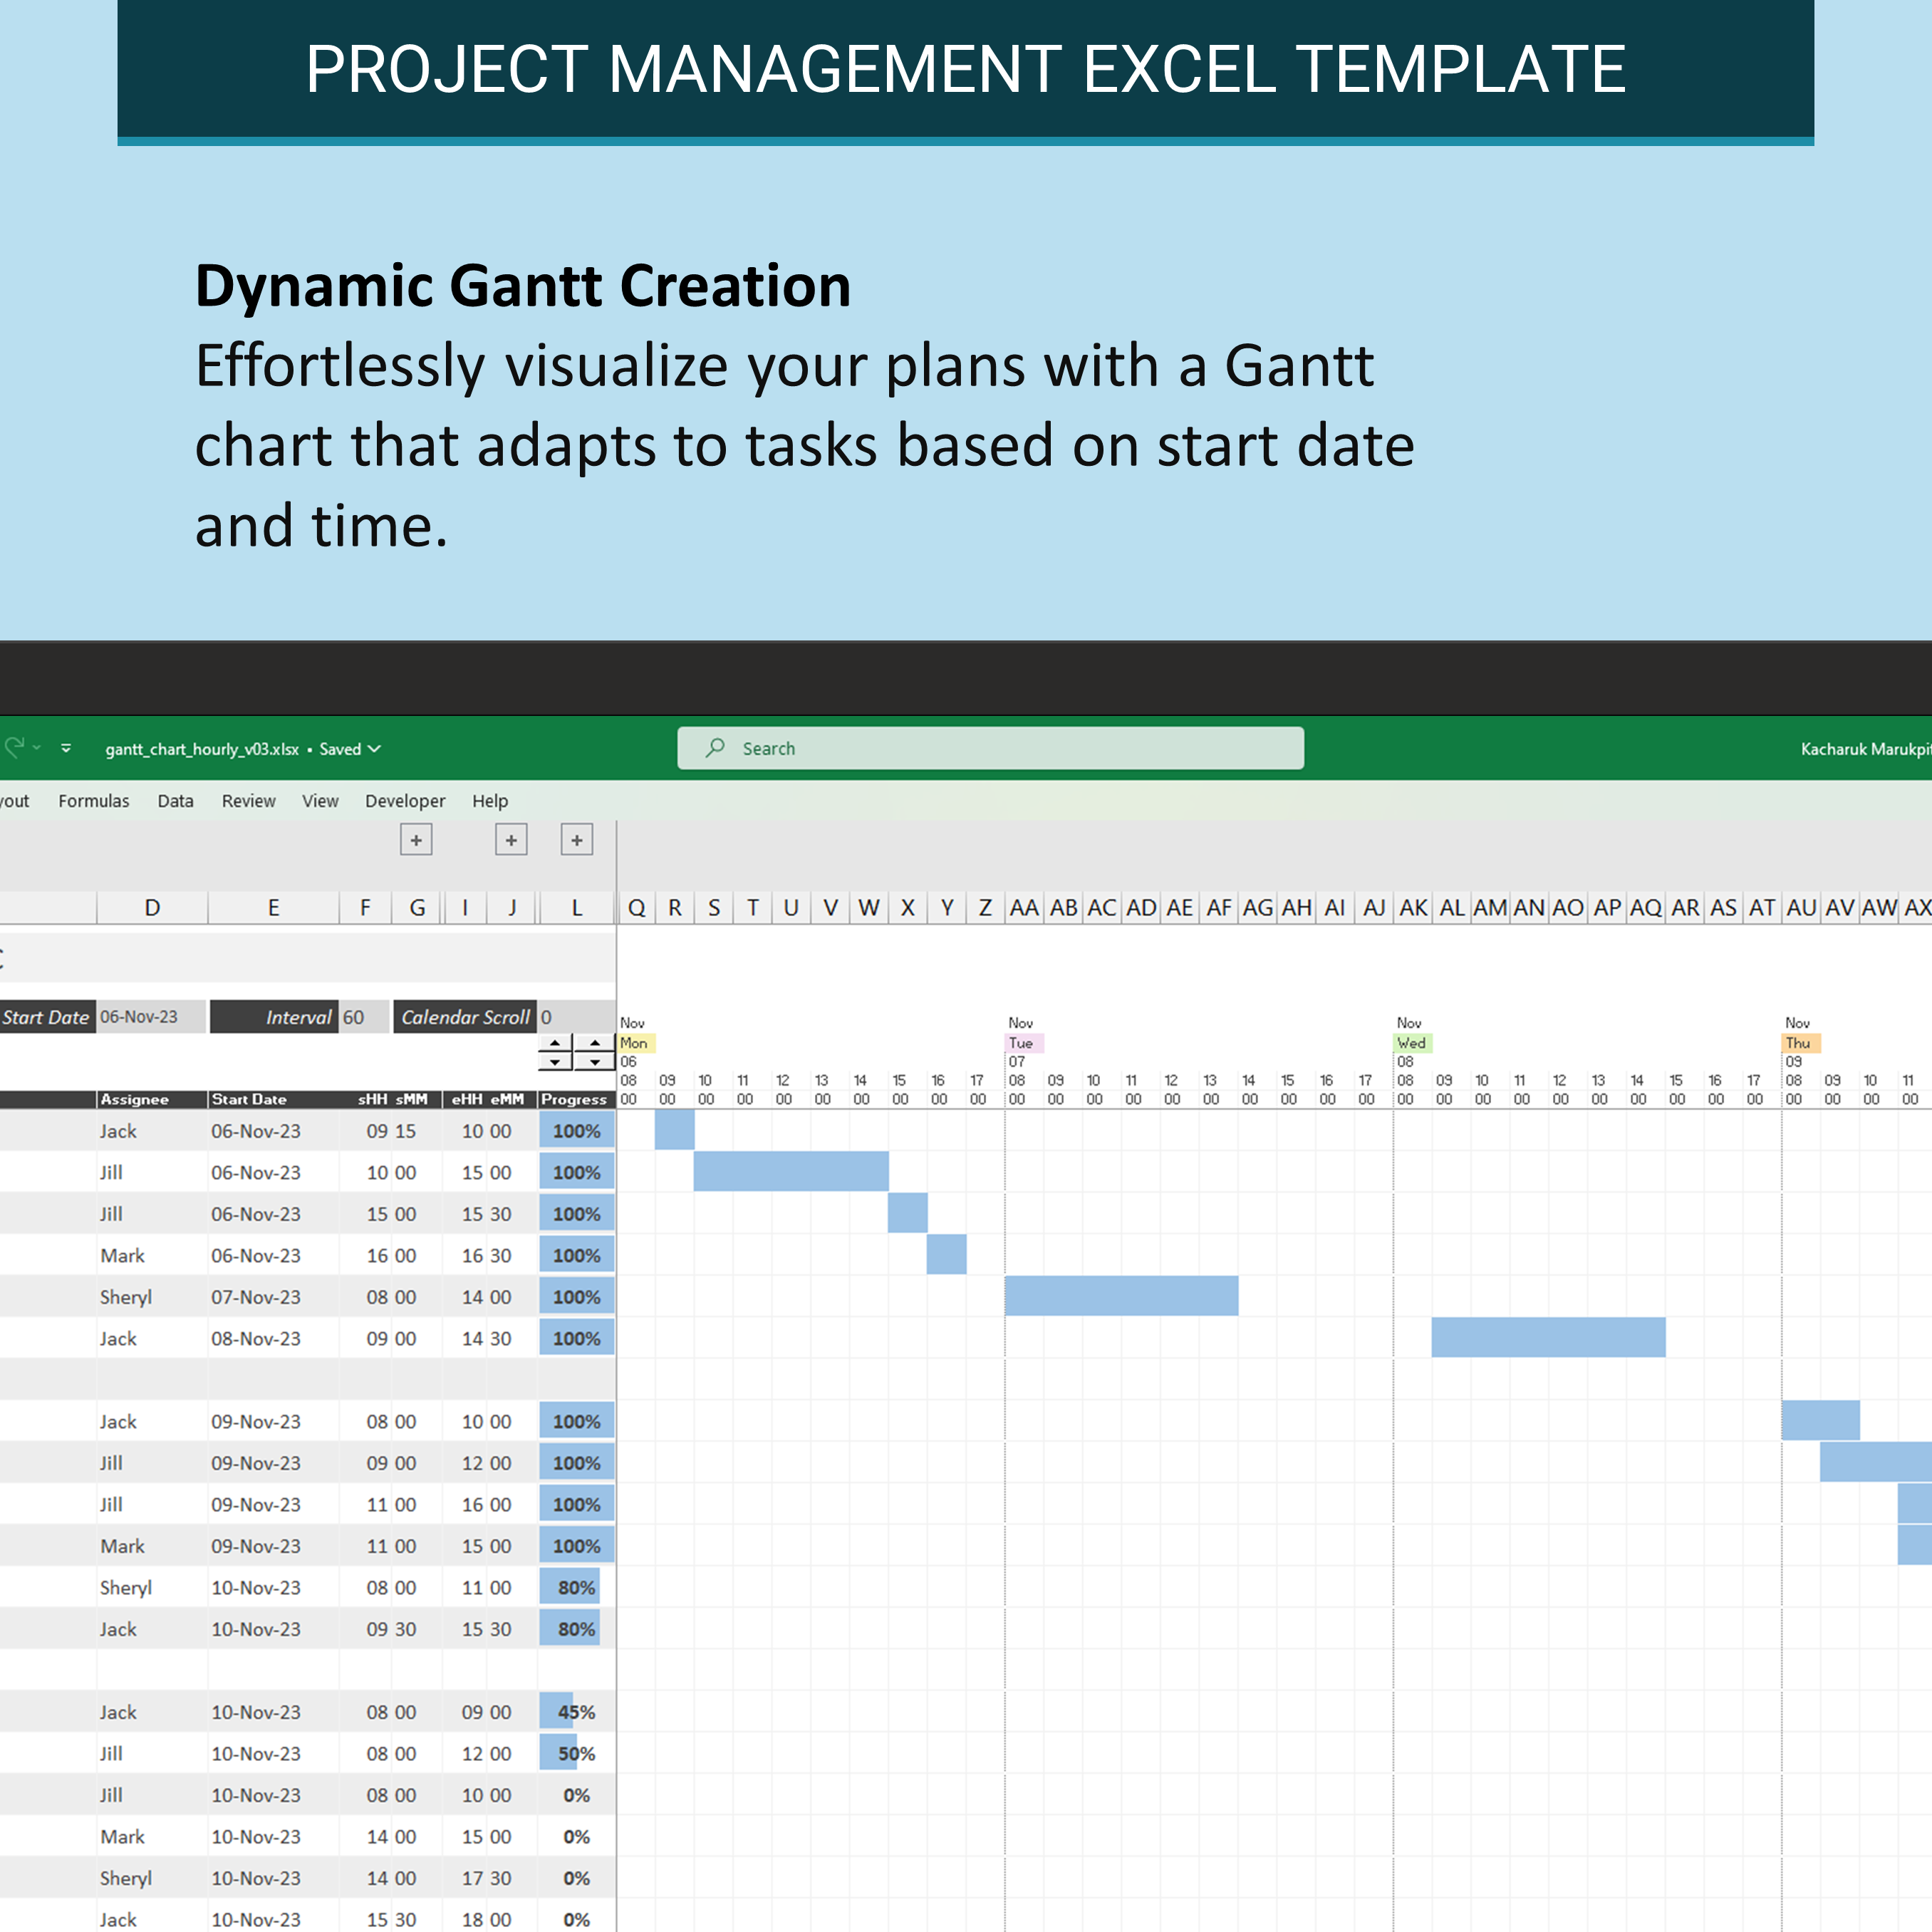
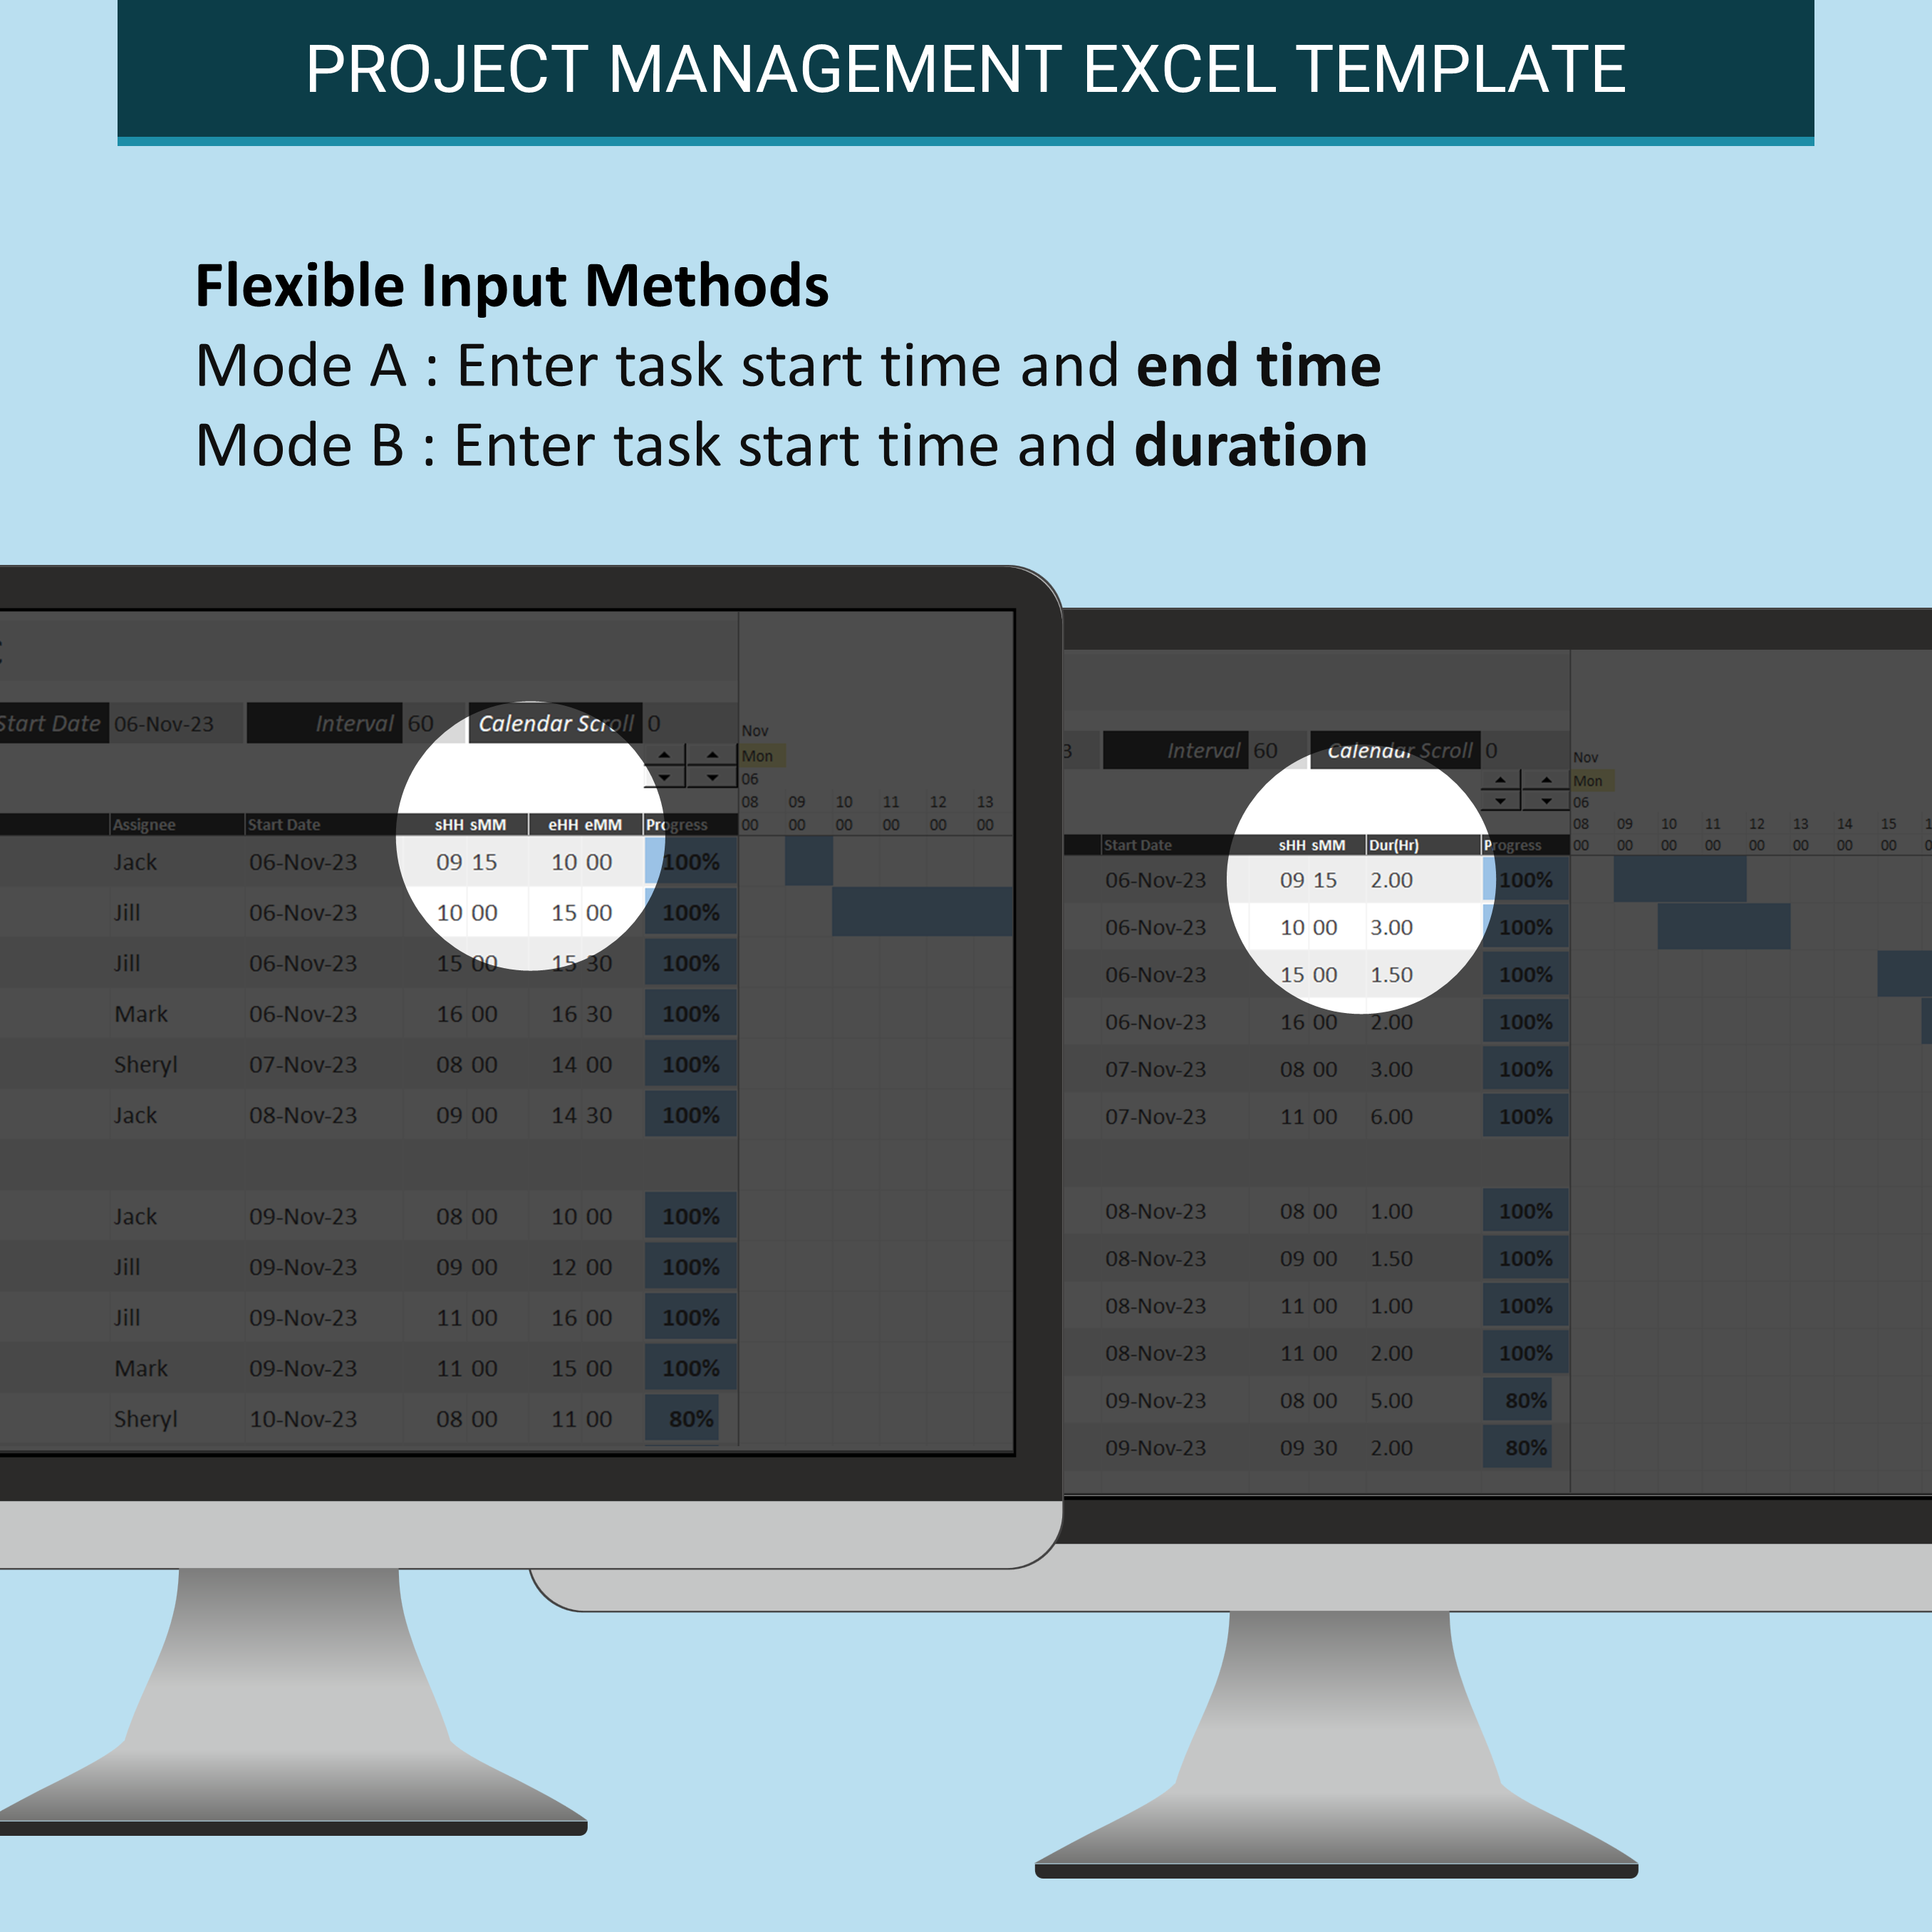
- Dynamic Gantt creation based on start date and time, with flexible input methods
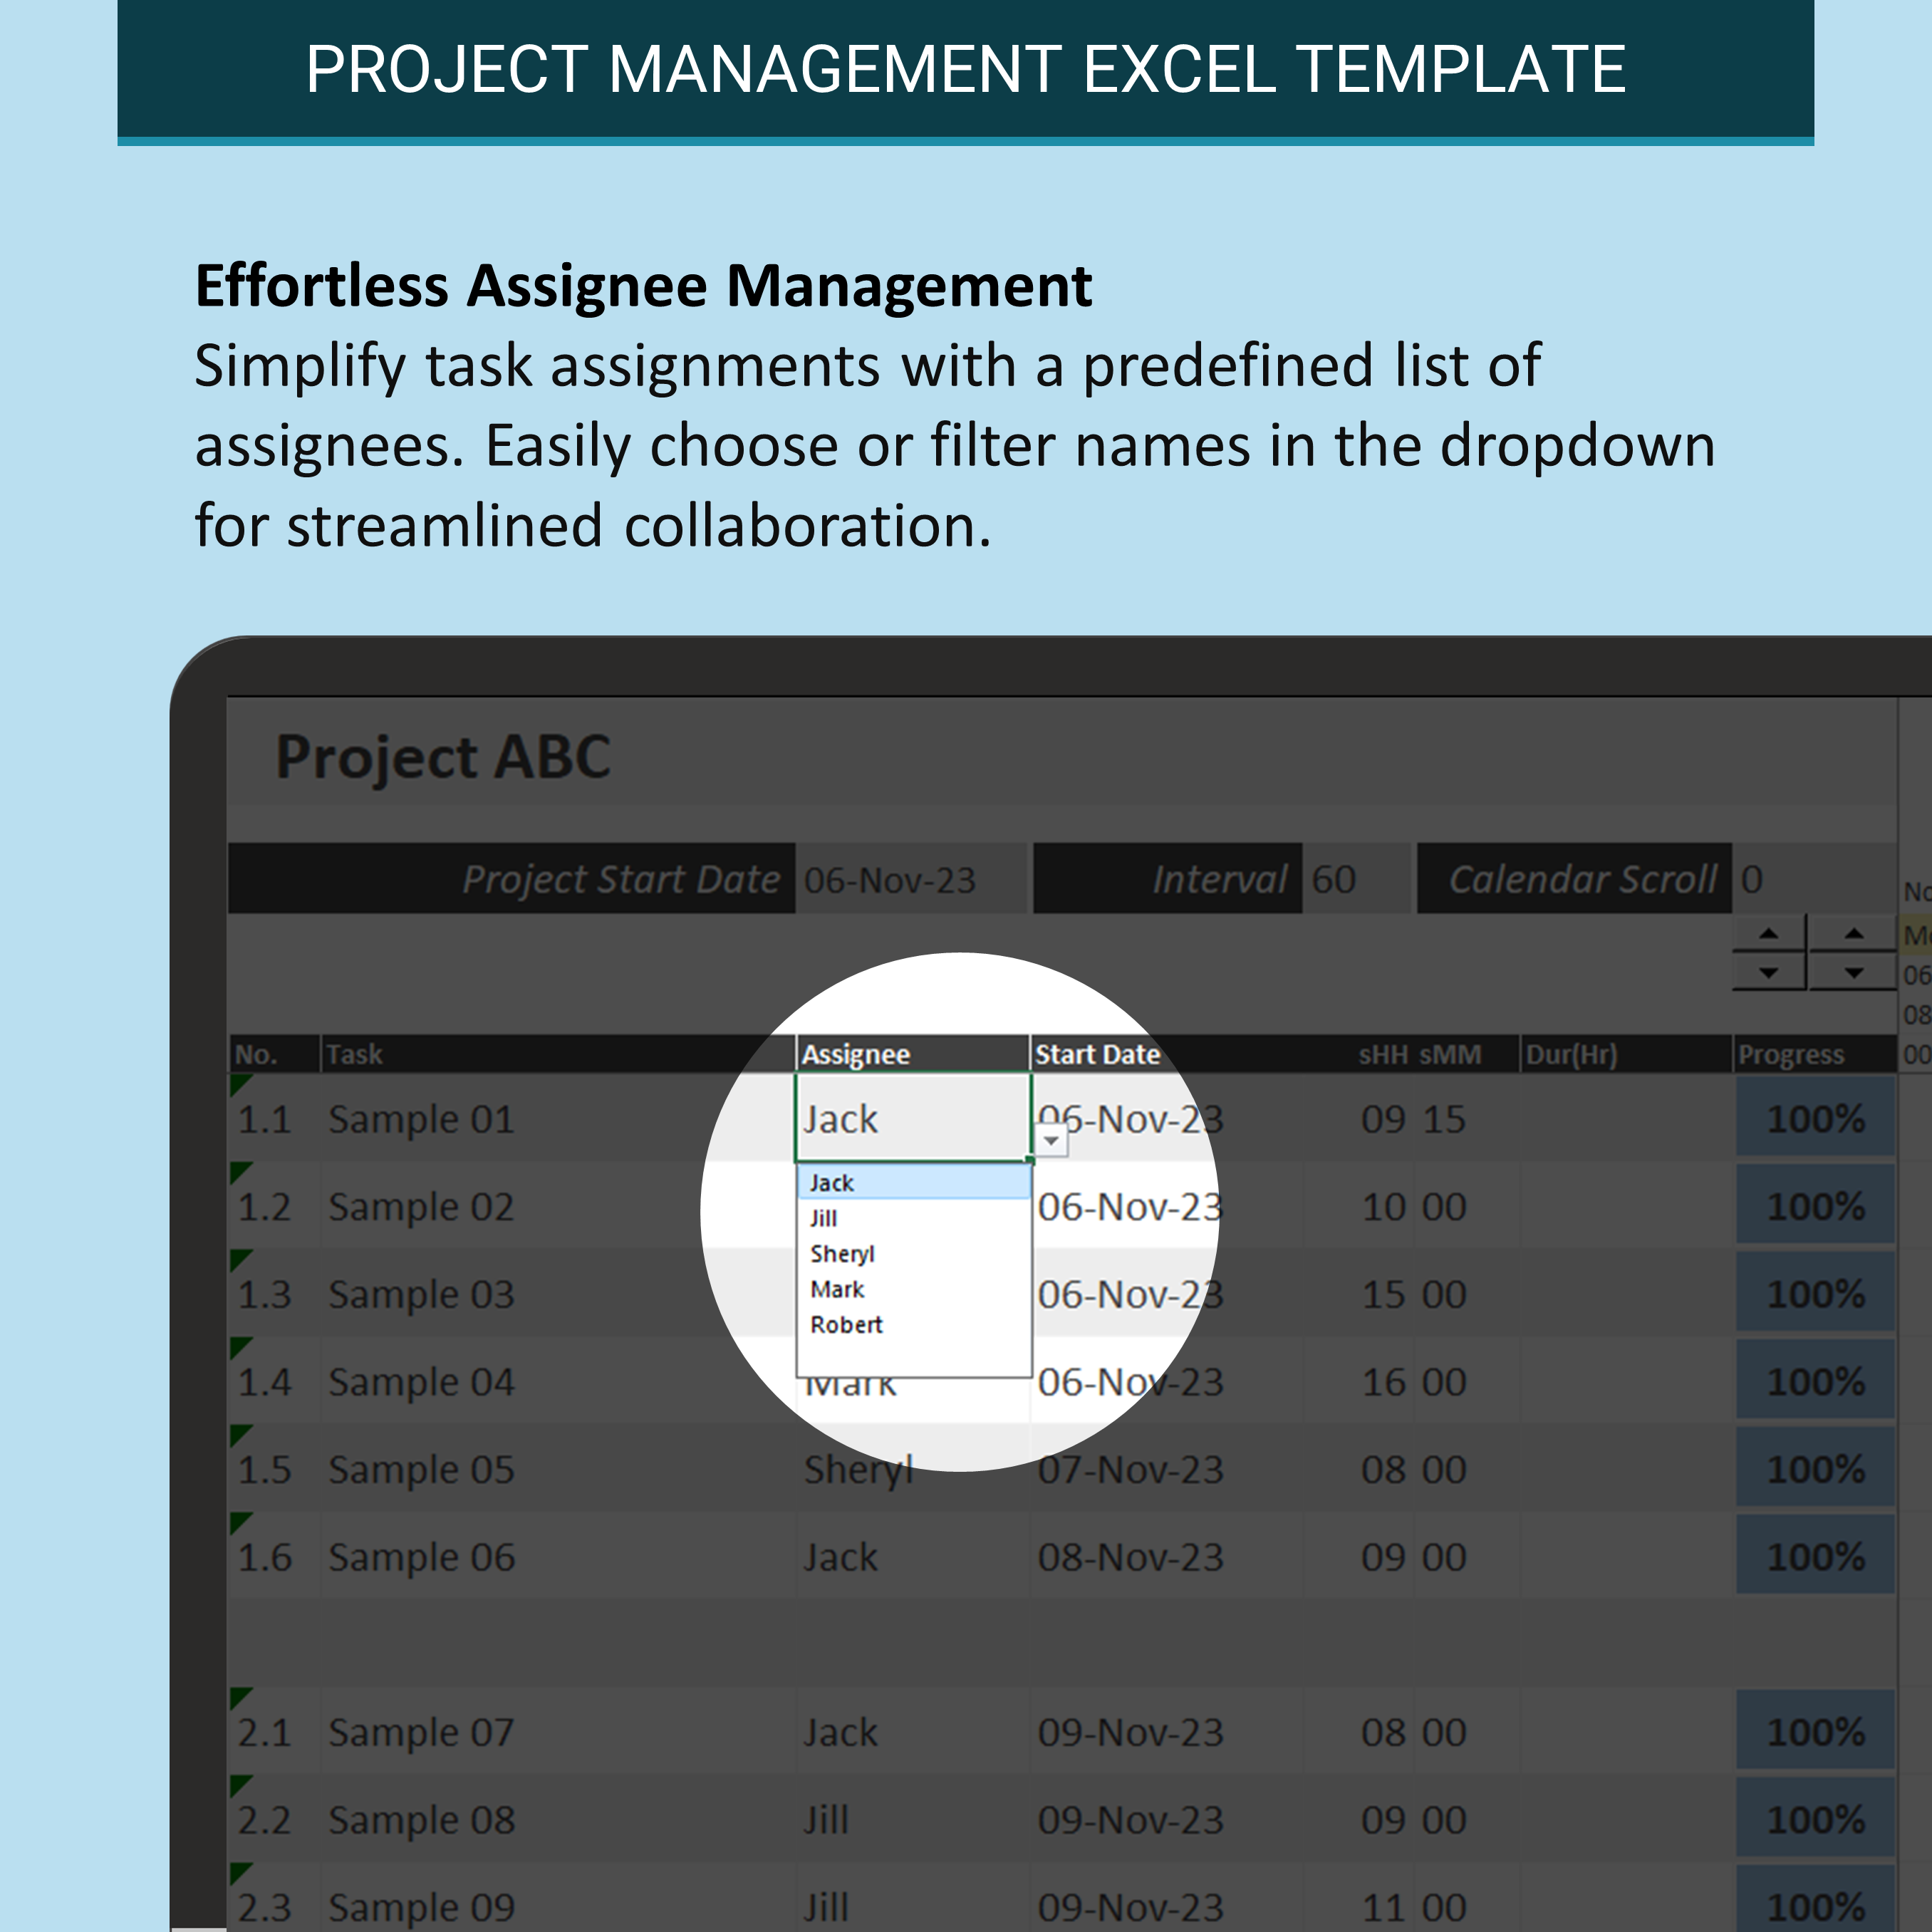
- Effortless assignee management with a dropdown list
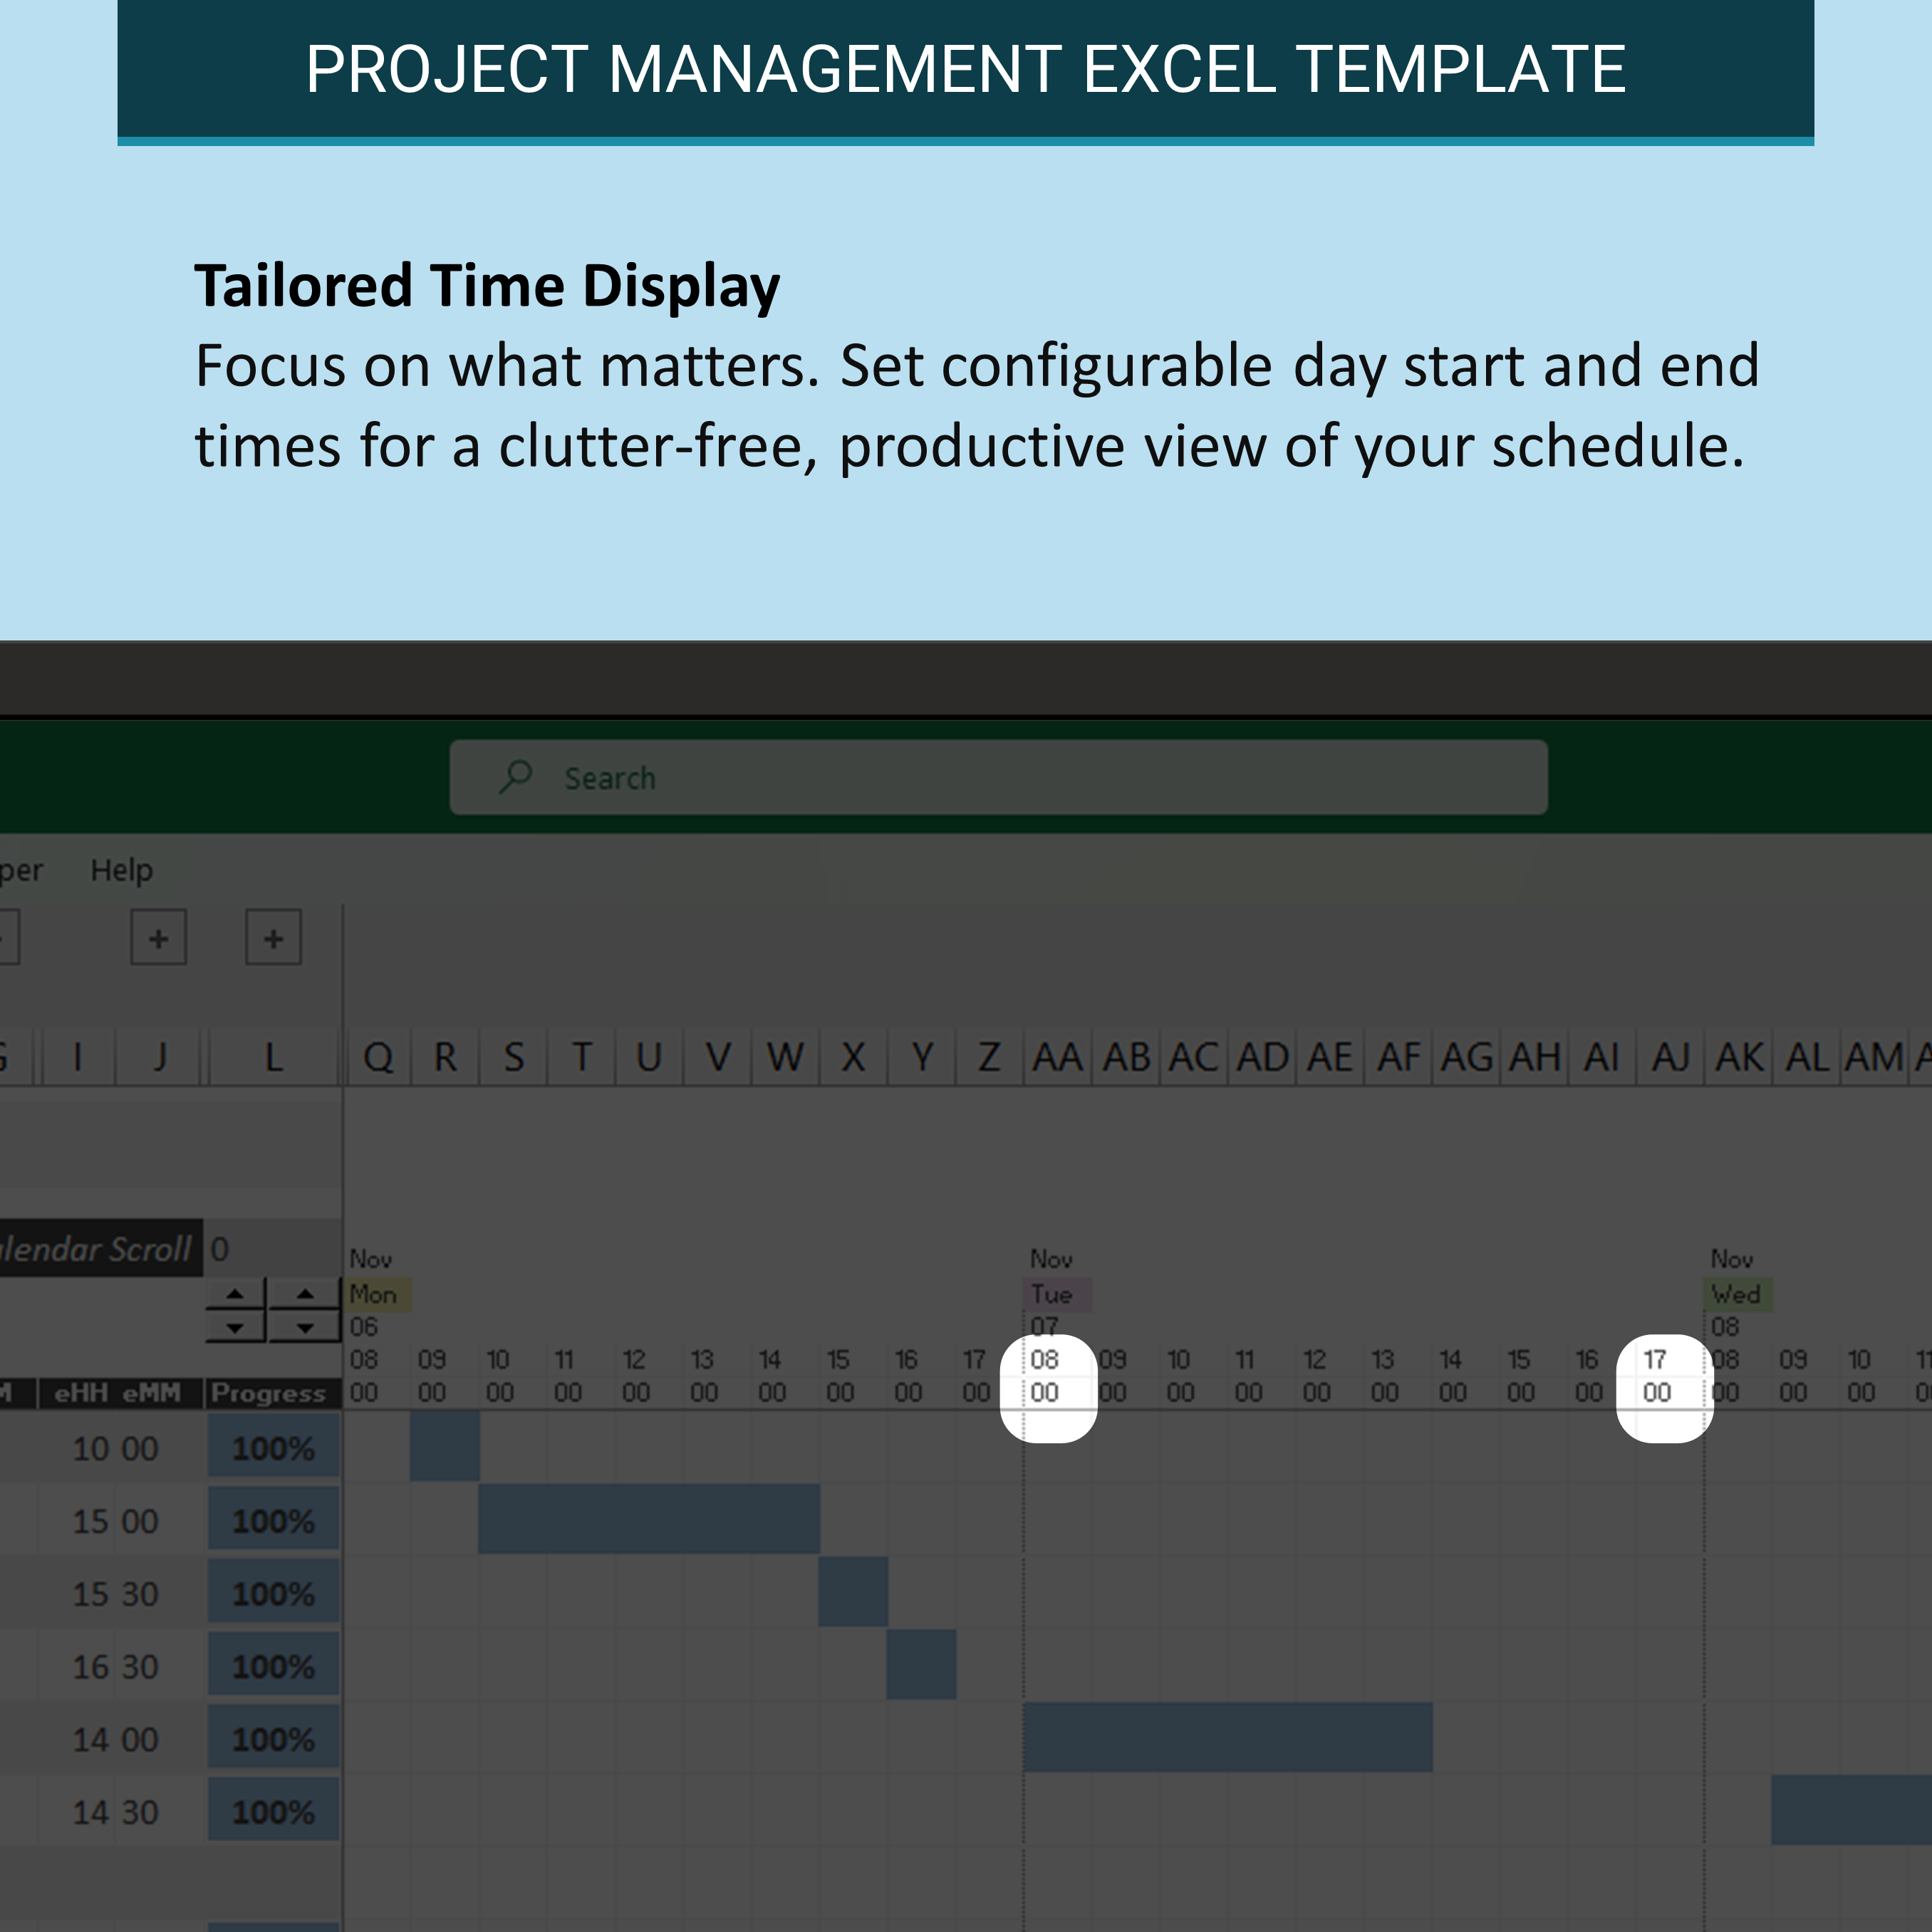
- Tailored time display for focused productivity
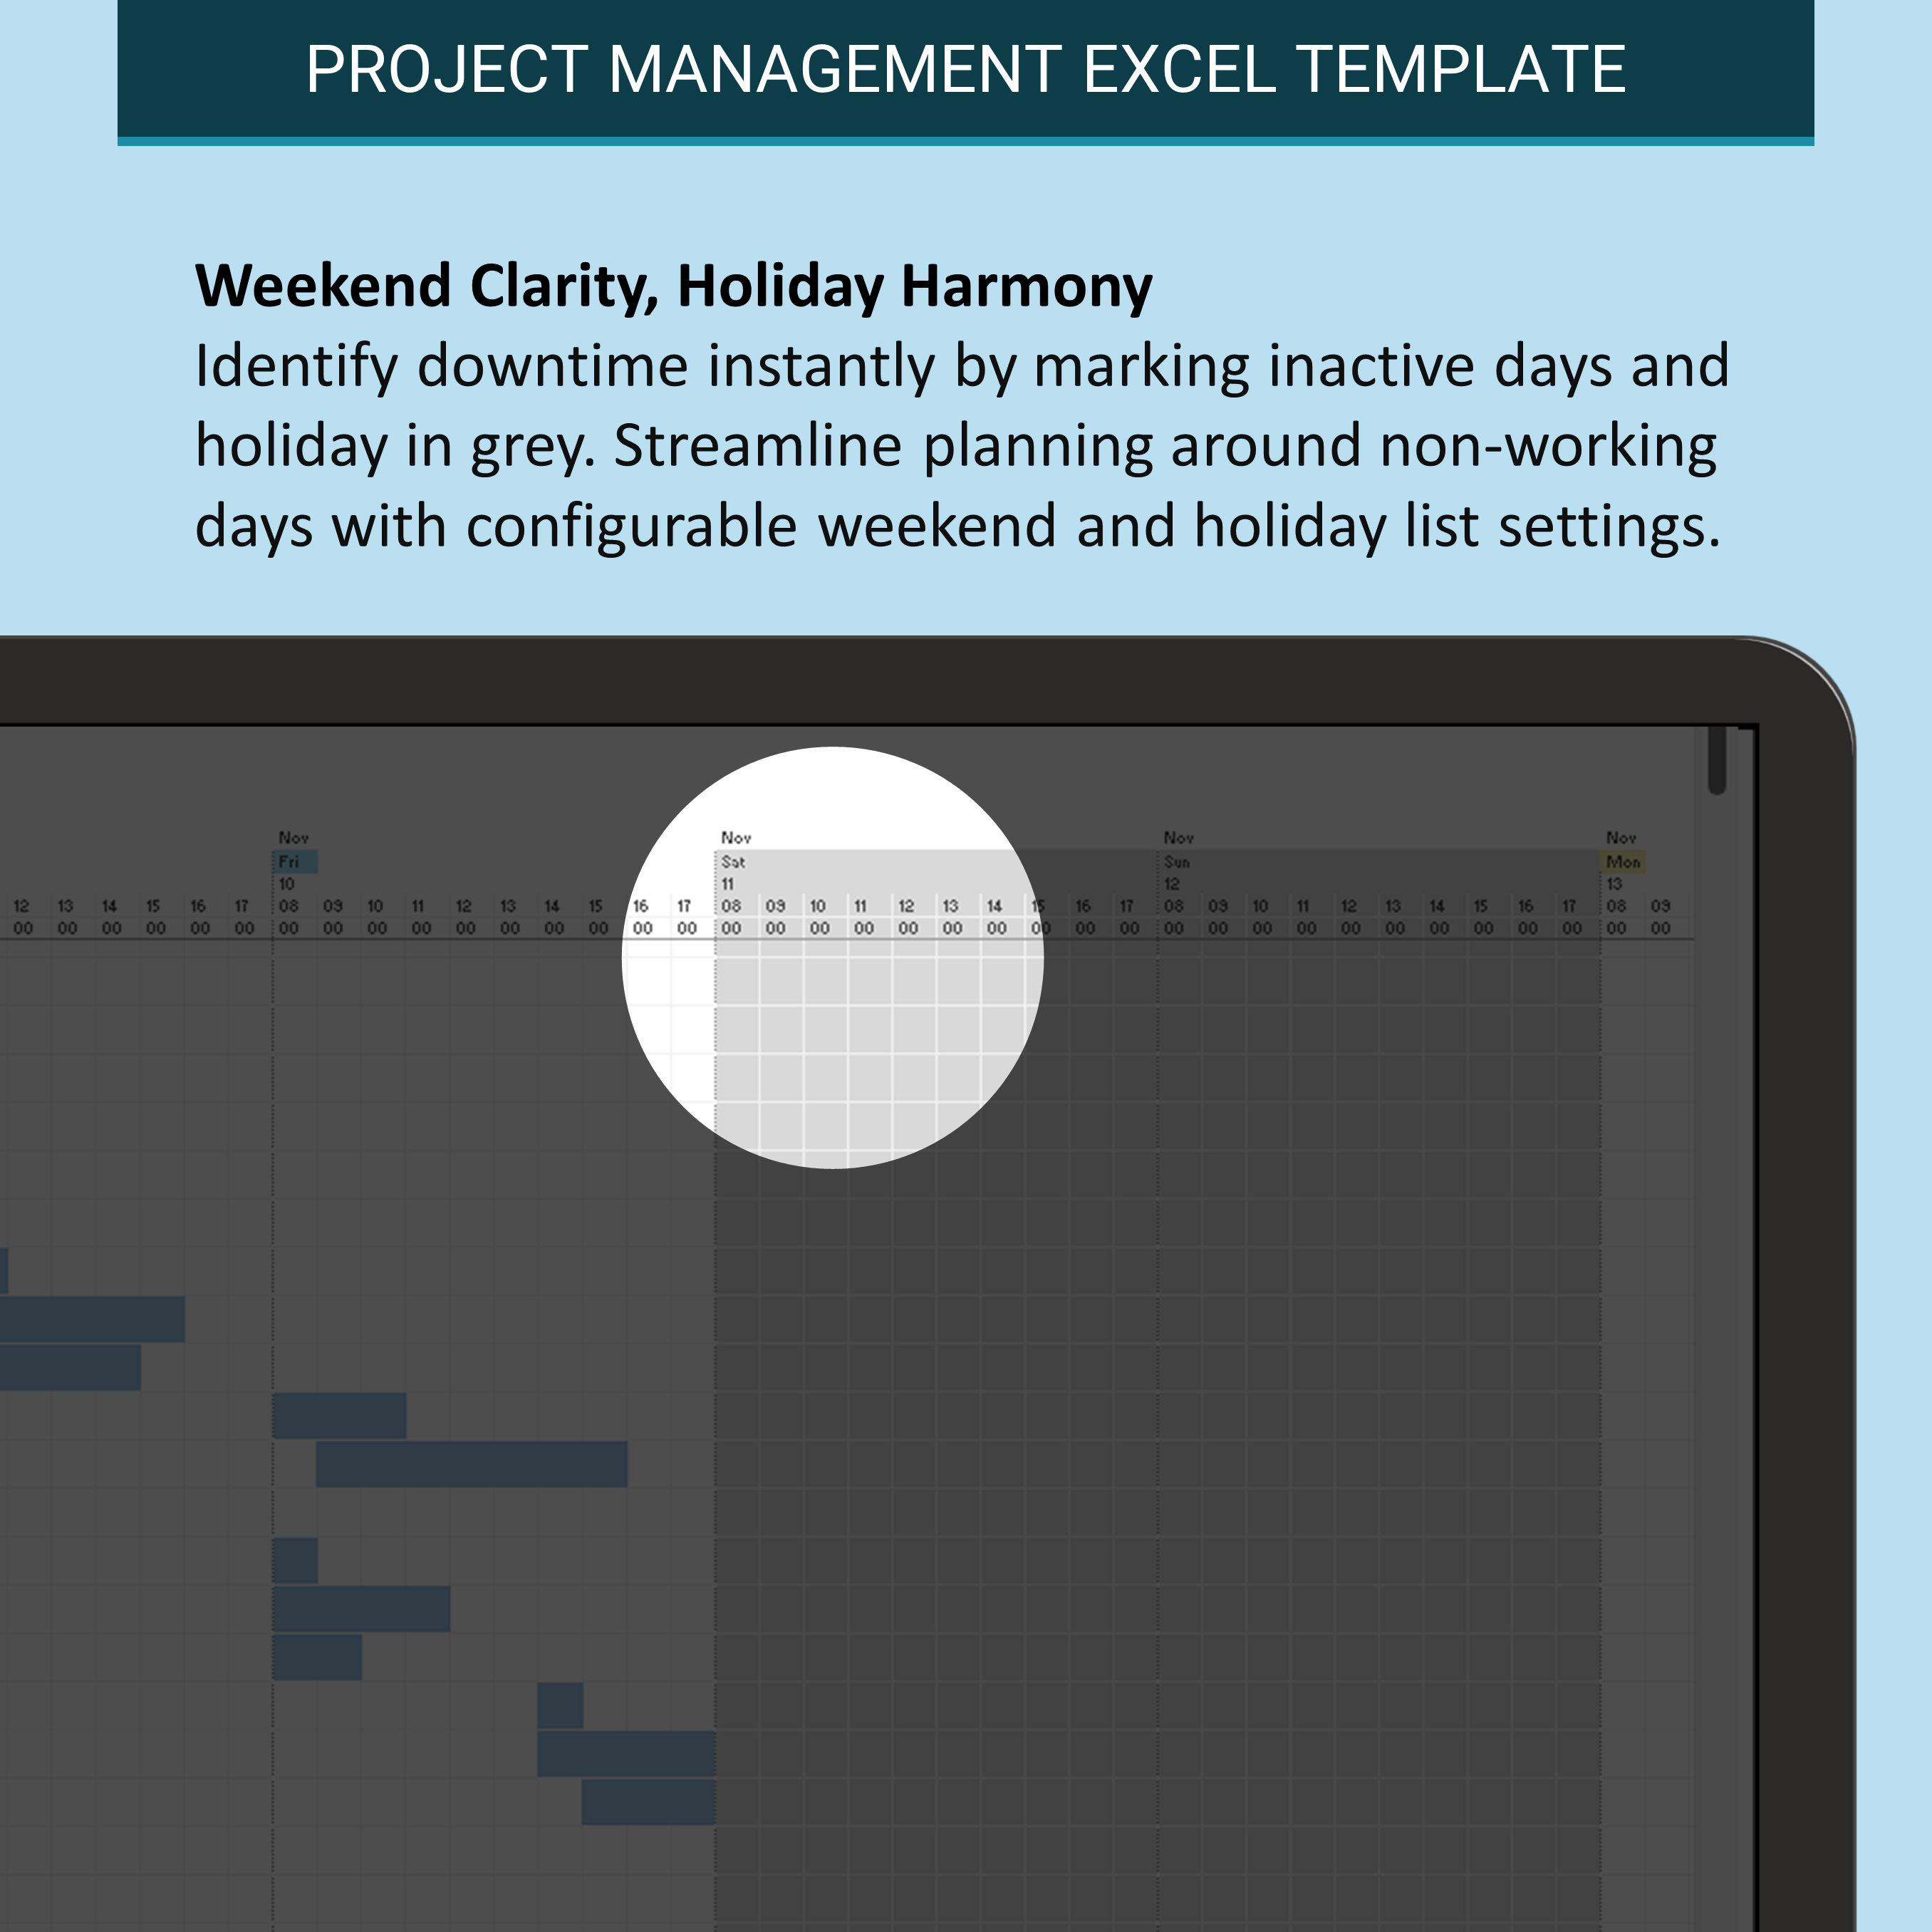
- Weekend clarity with configurable inactive days
- Configurable holiday list for seamless planning
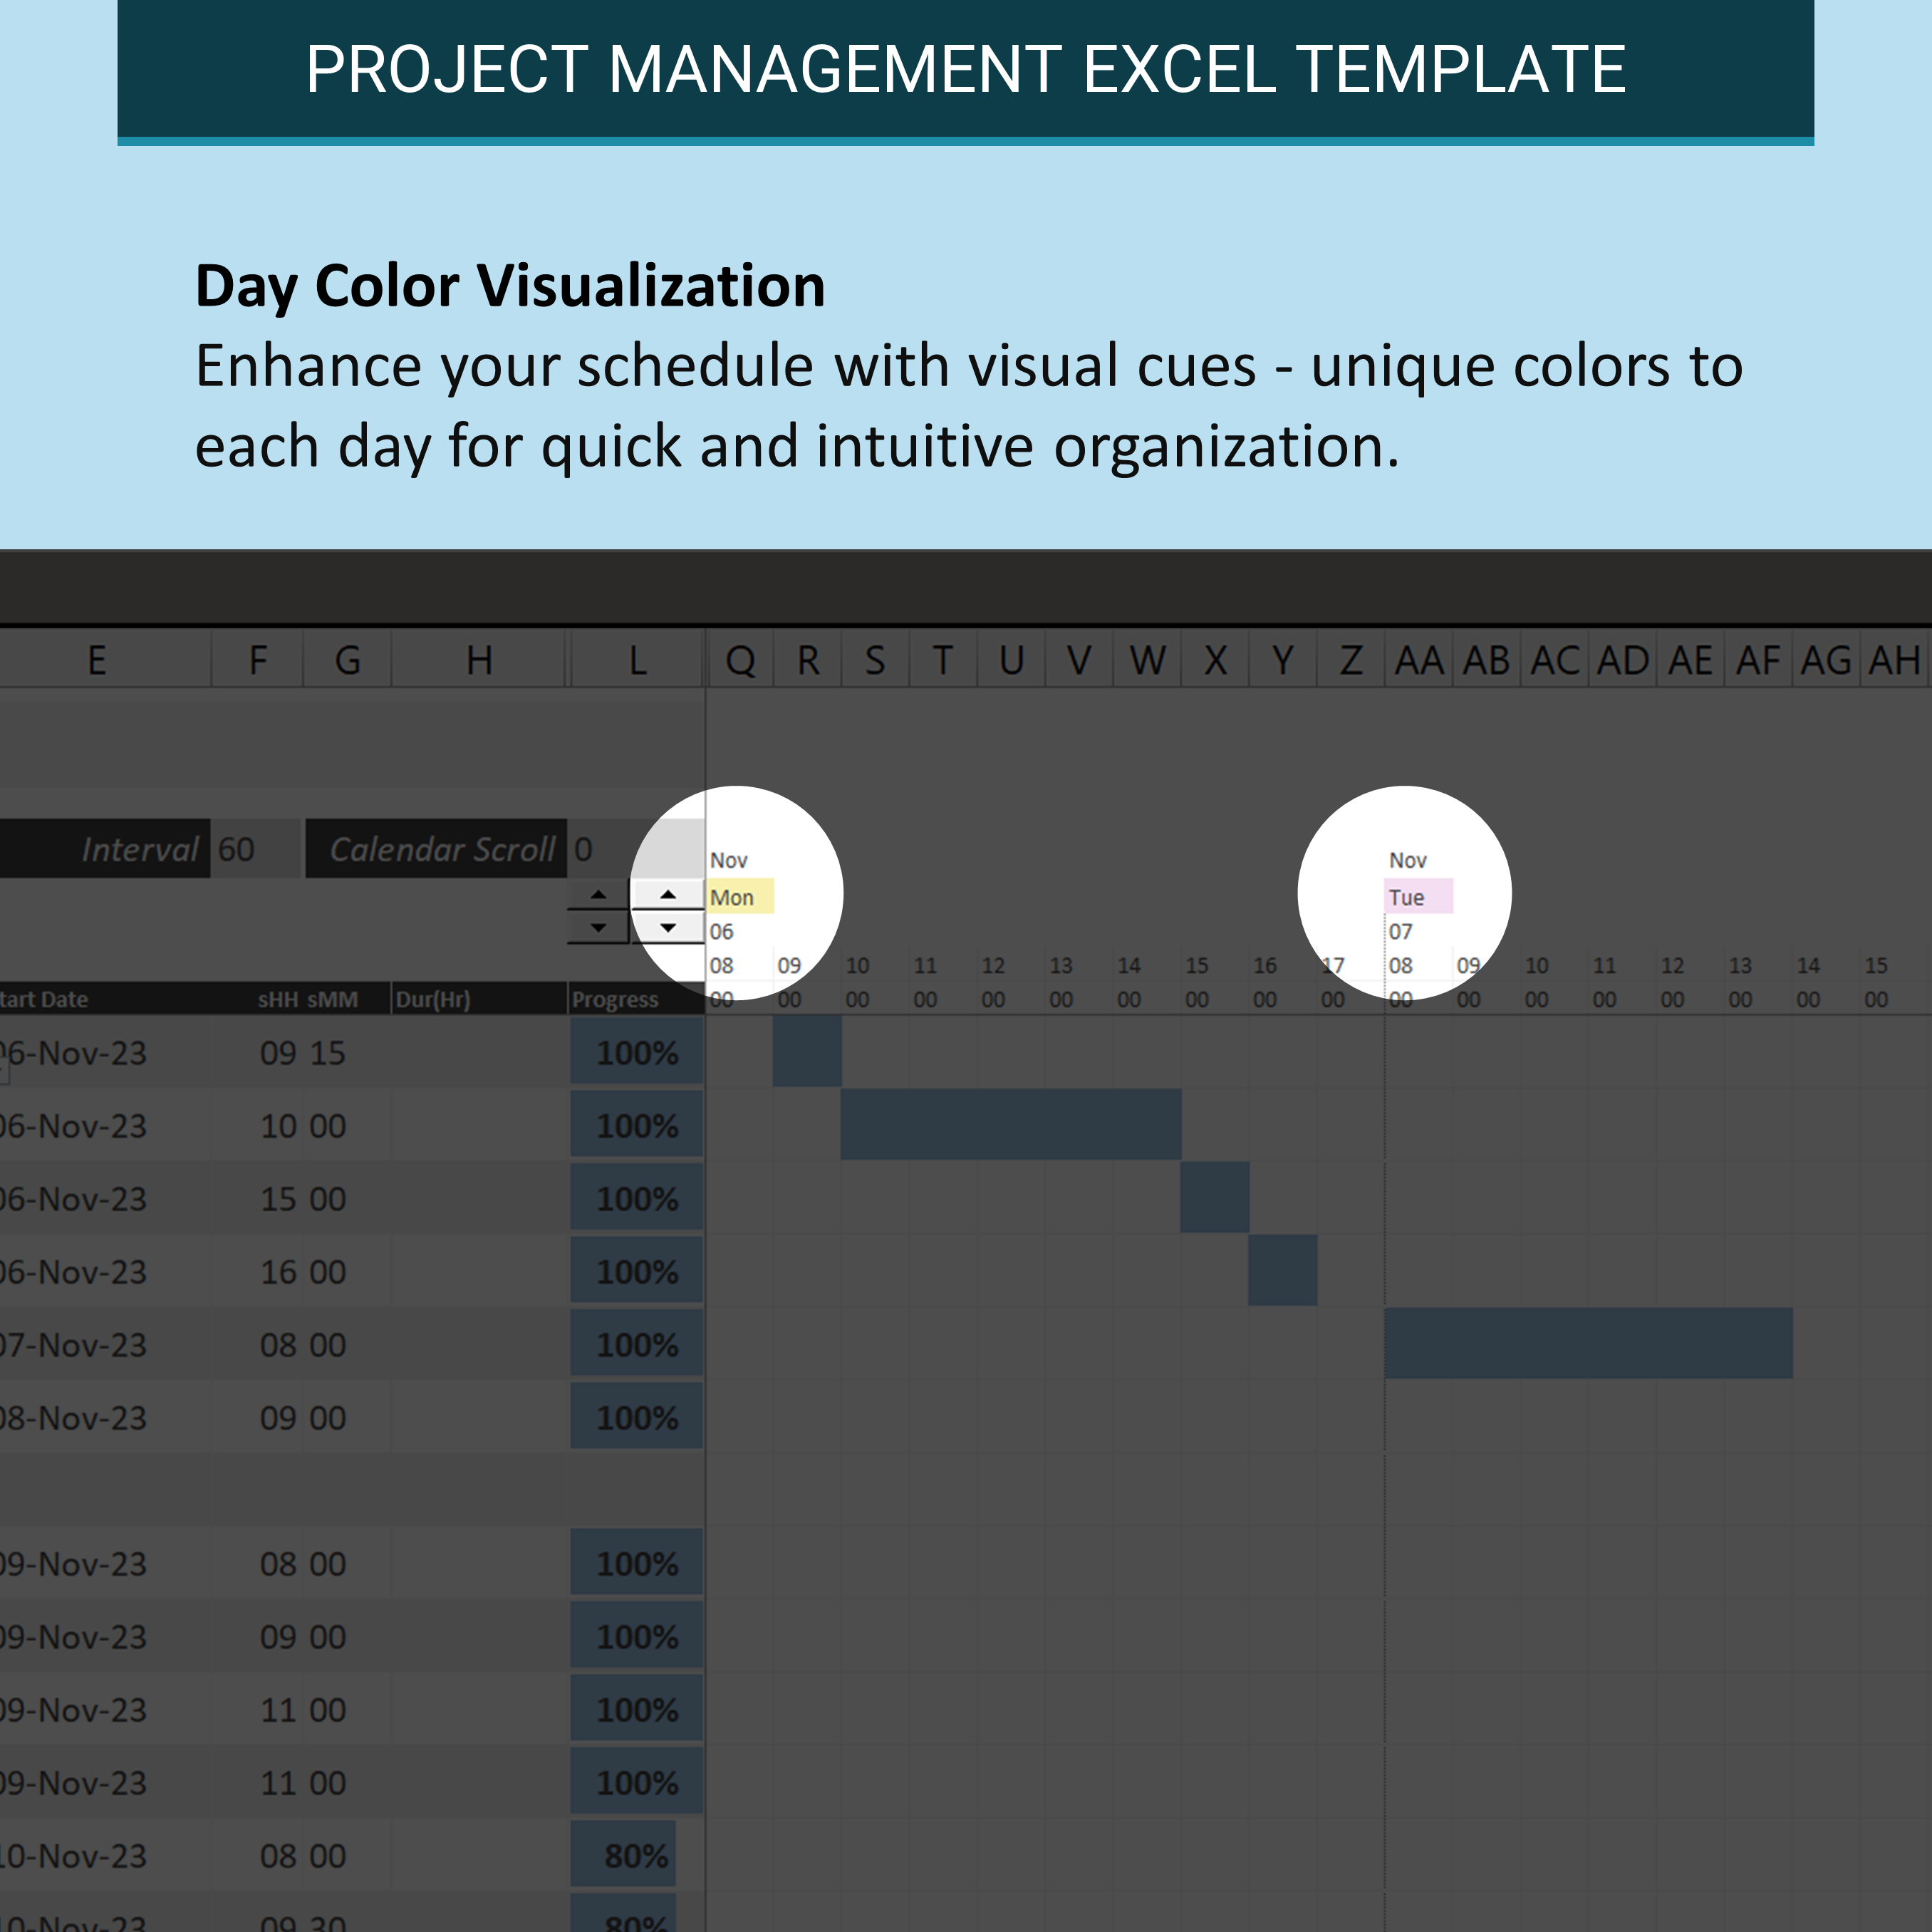
- Day color visualization for intuitive organization
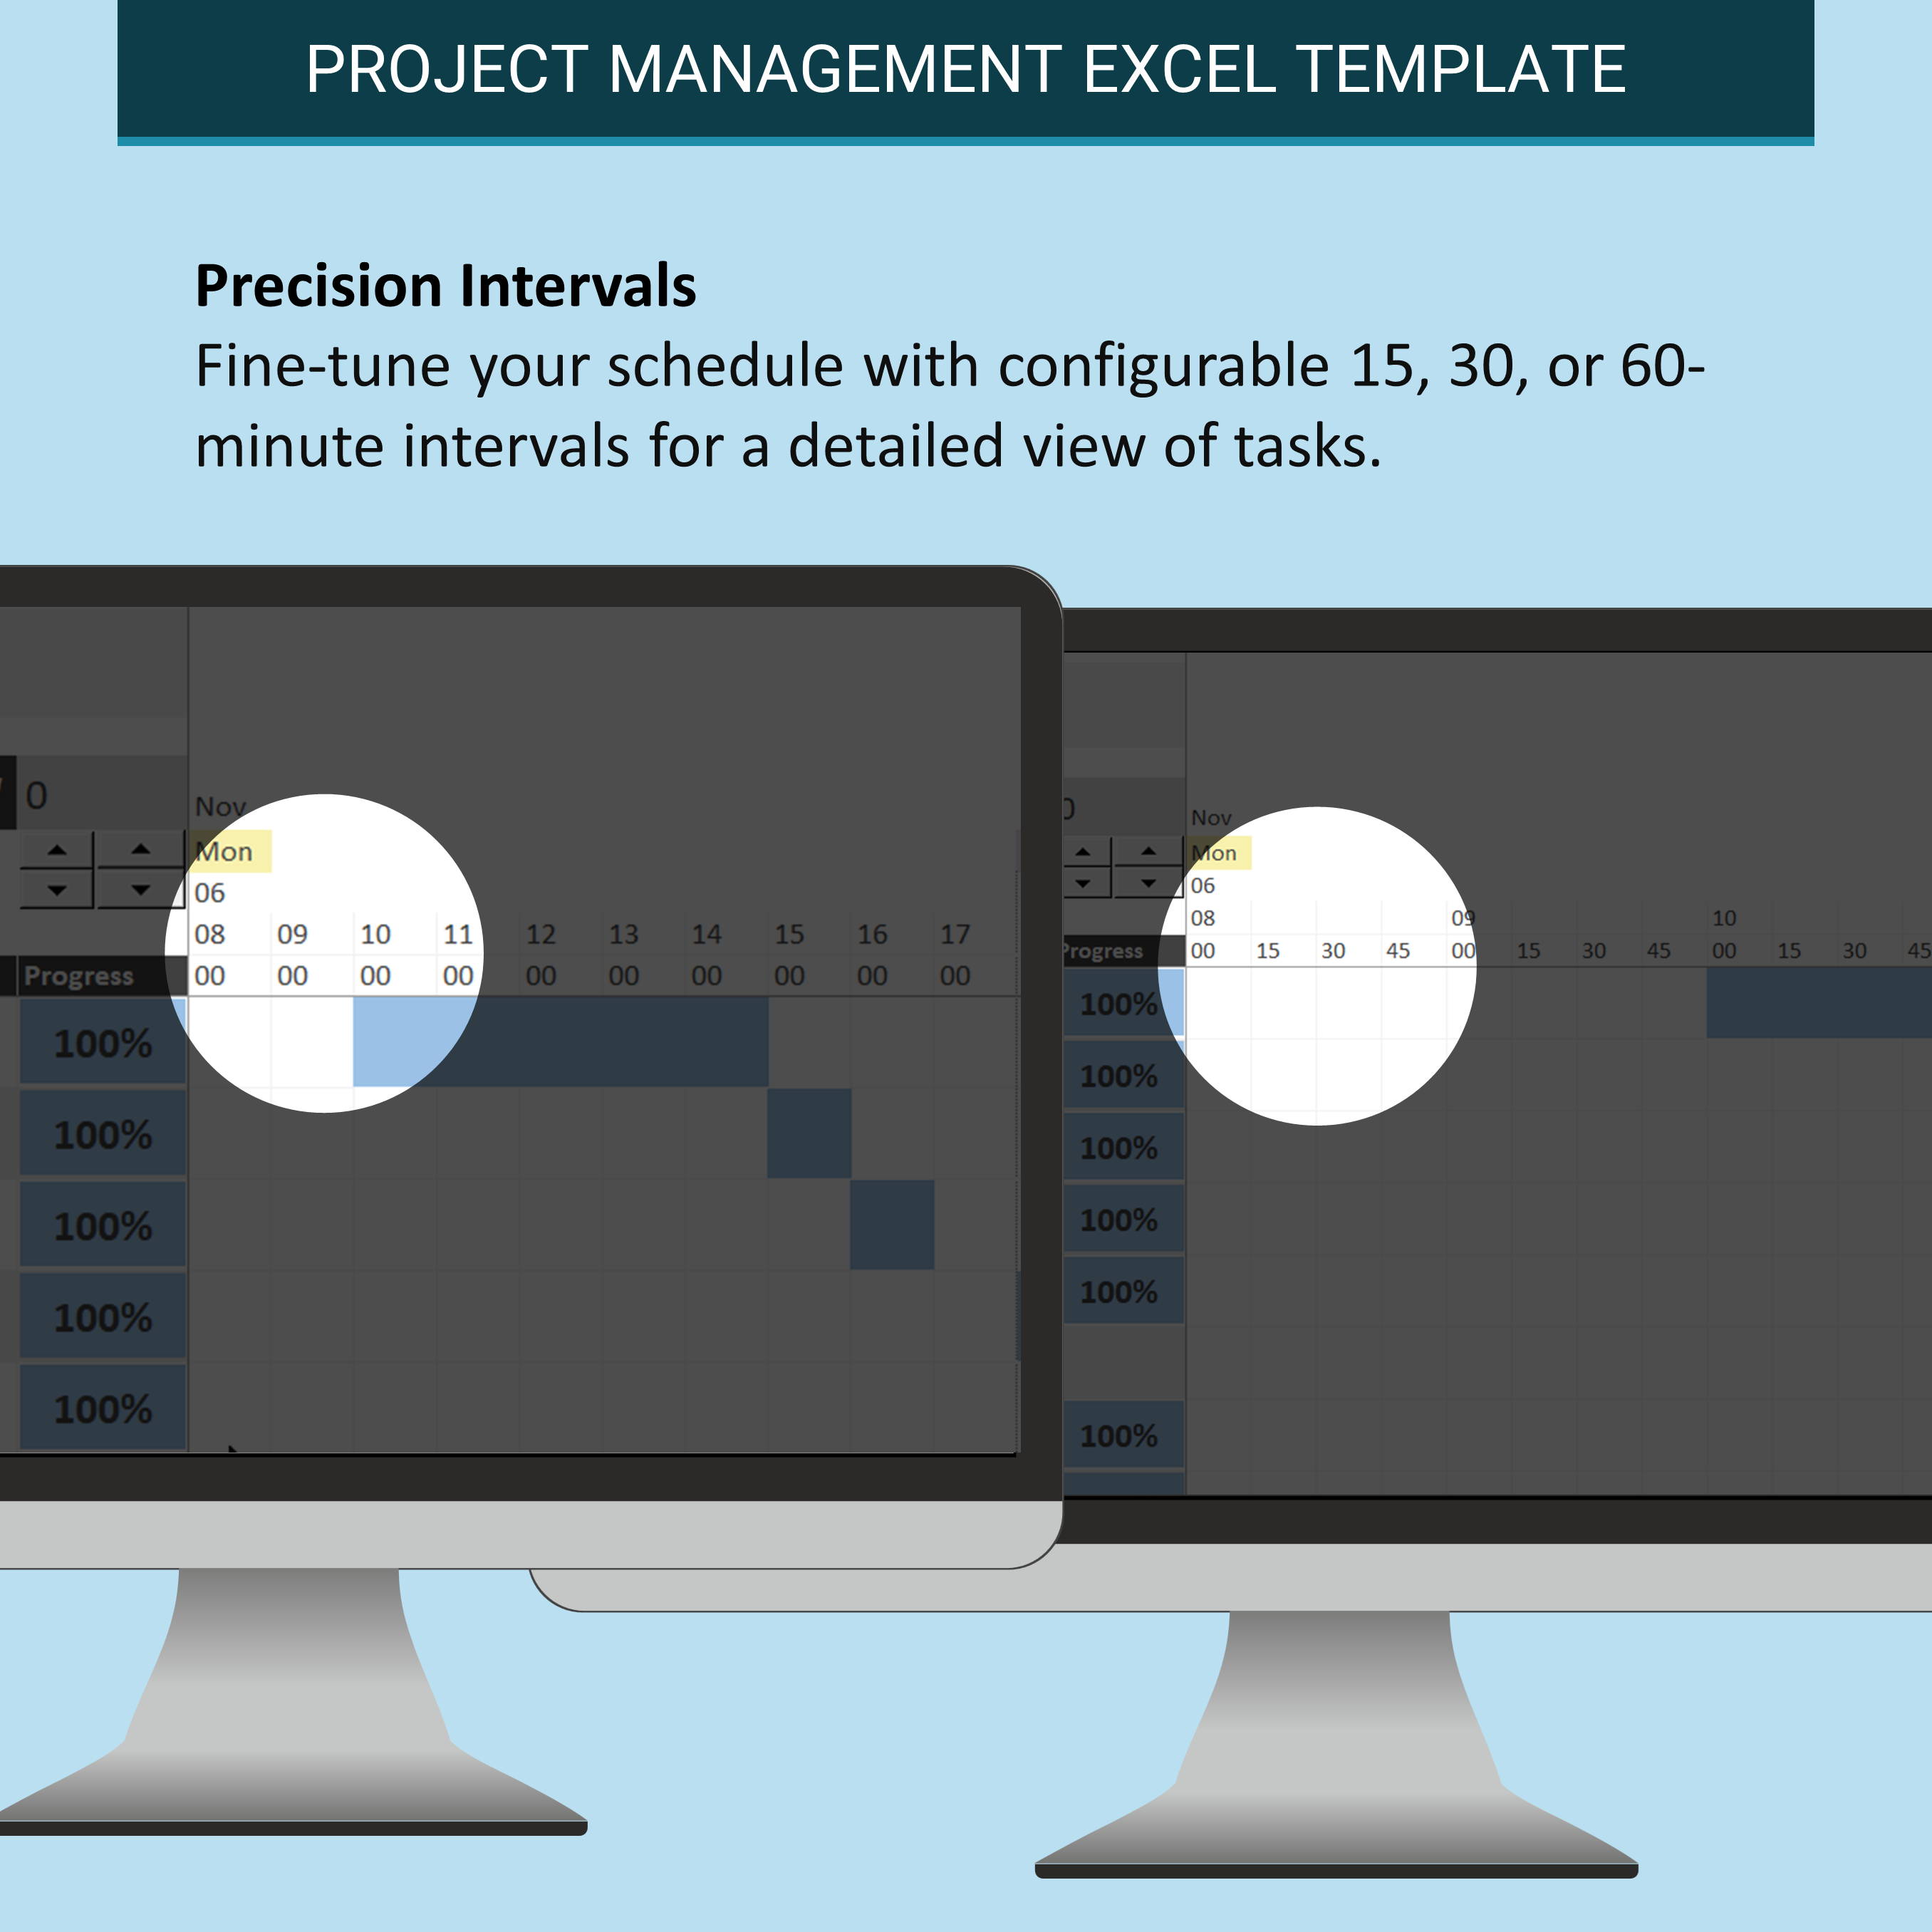
- Precision intervals: 15, 30, or 60 minutes
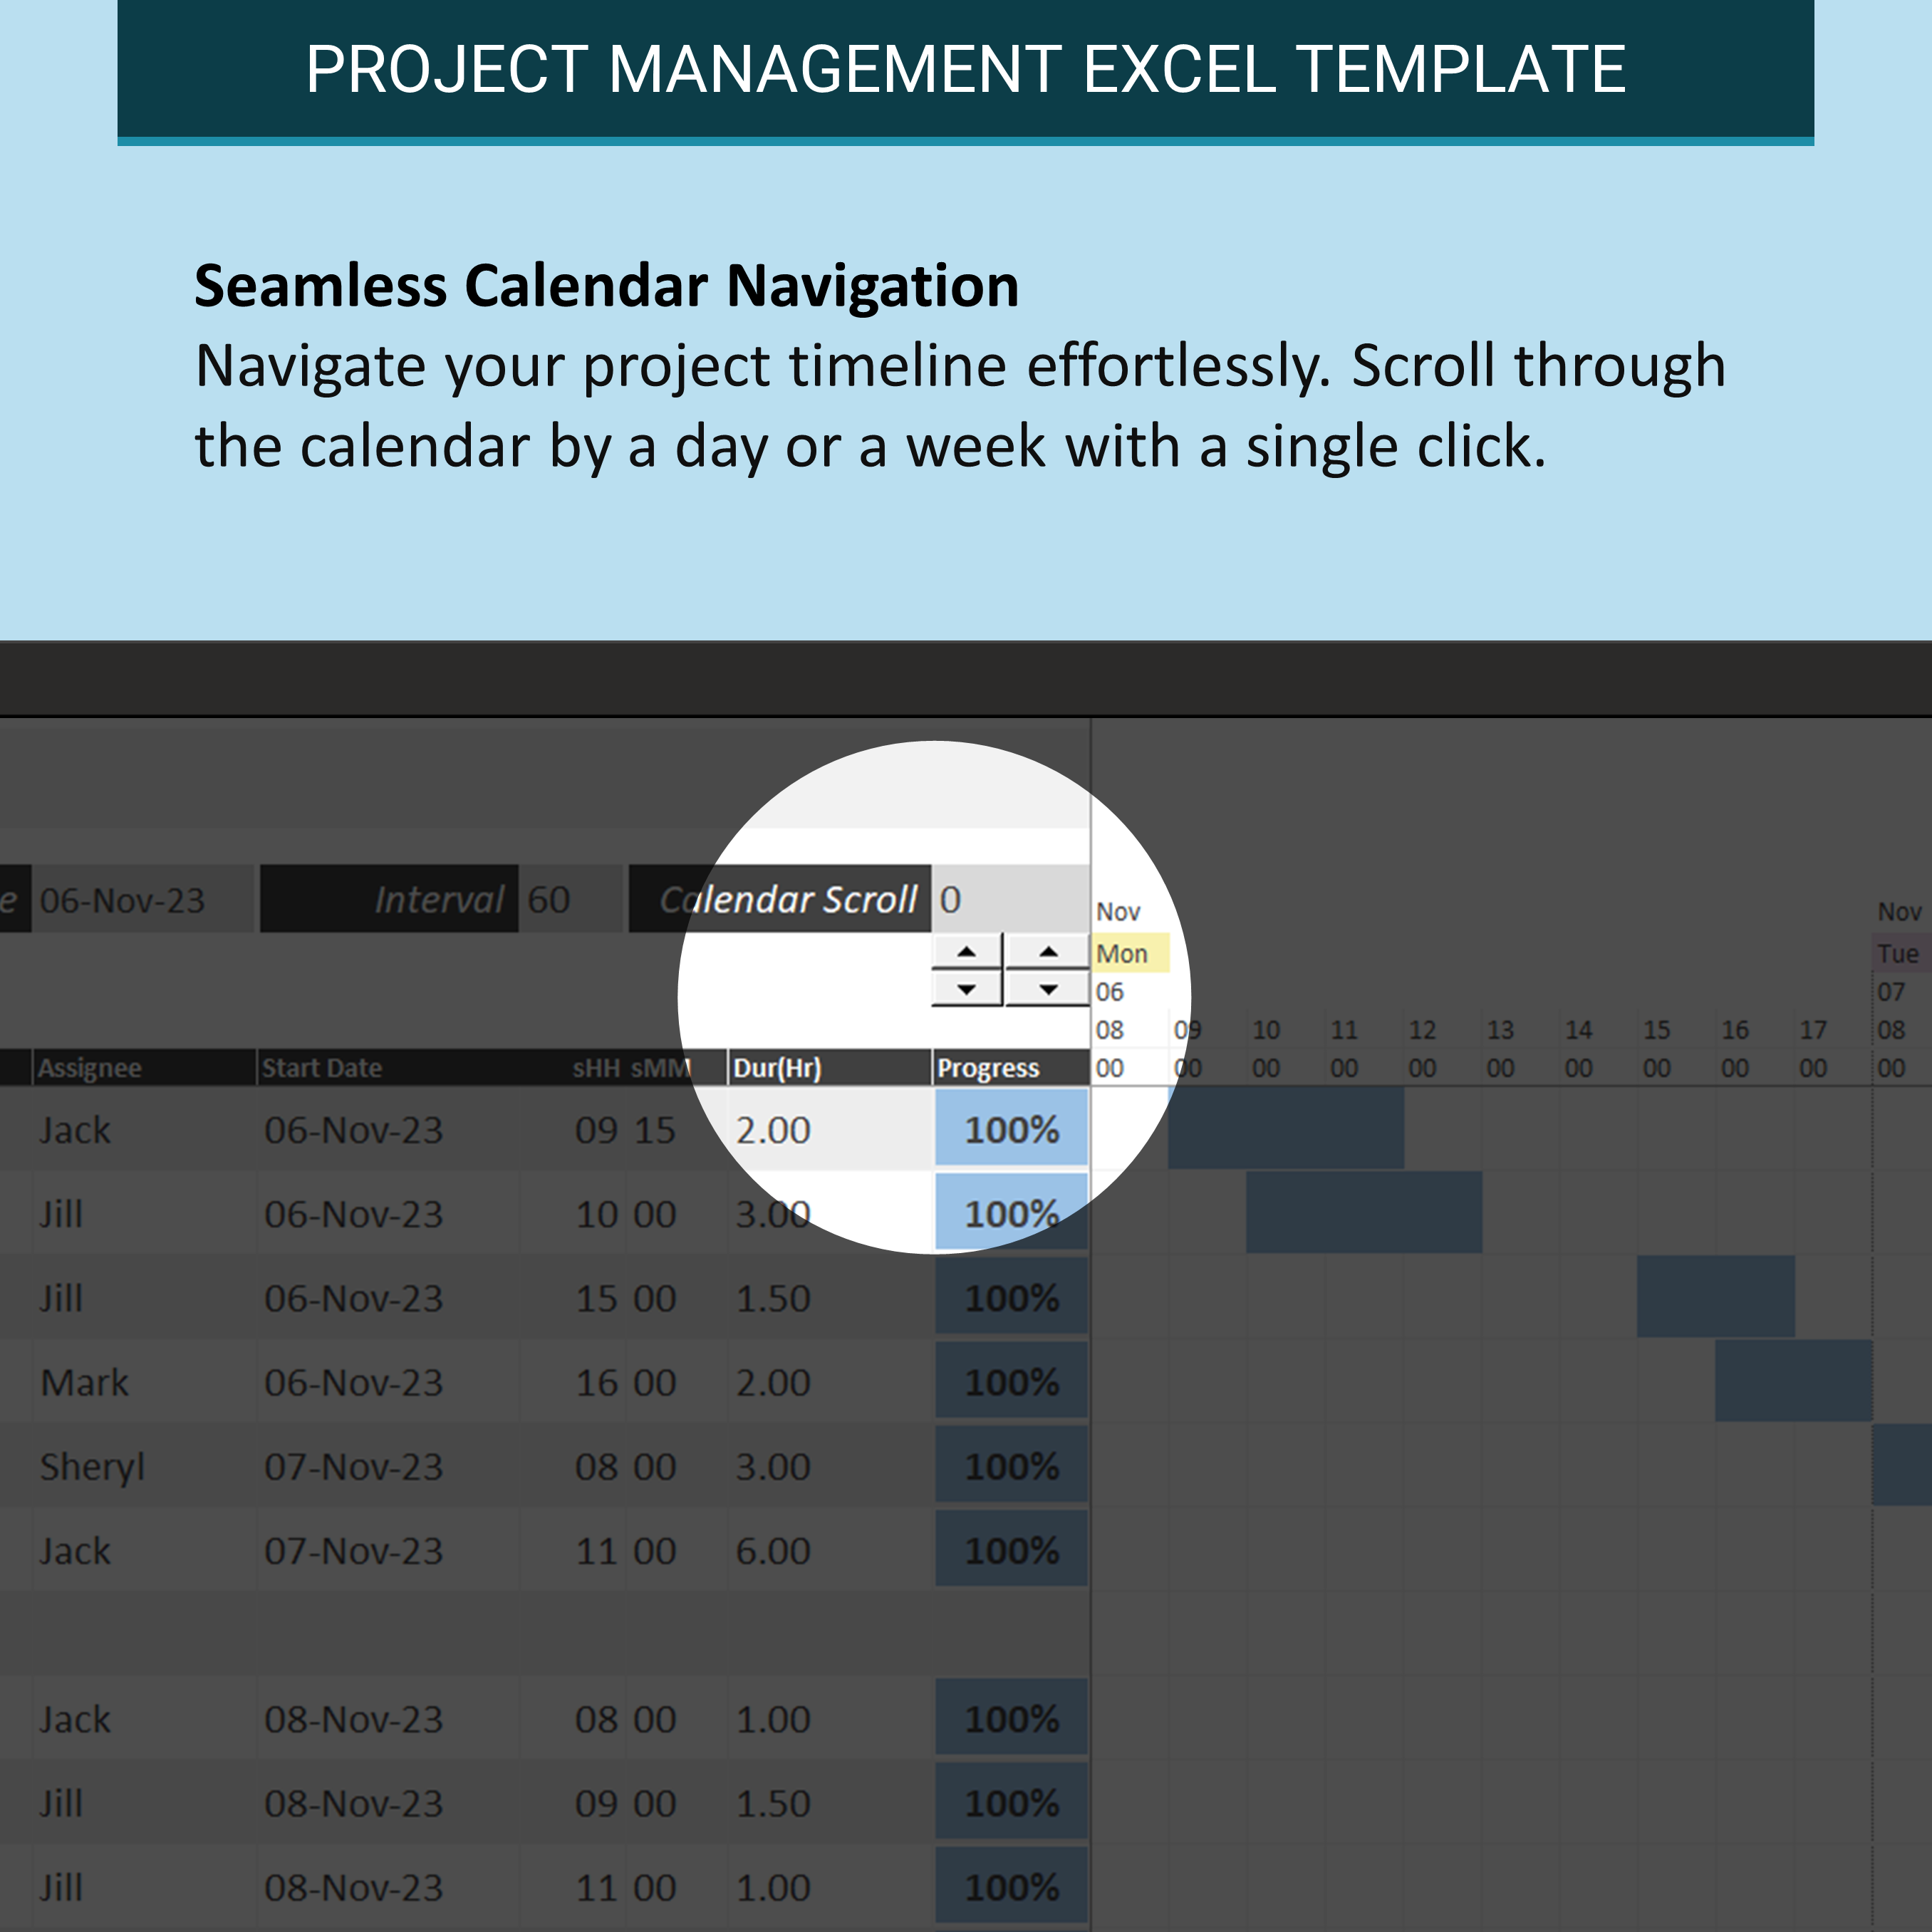
- Seamless calendar navigation for easy project oversight
🧑💻👨💻Software Requirement🧑💻👨💻
Microsoft Office 365, 2013, 2016, 2019 for Windows; orMicrosoft Office 365 for MacMicrosoft Office 365 Online
📖📖License📖📖
Please do not resell or put this file up for the public to download
Quick Start Guide
1. Very first step is to choose the template based on your input method preference: Mode A : Choose this mode if you prefer to enter Start time and end time Mode B : Choose this mode if you prefer to enter Start time and durationIn both modes, the template has the formulas that calculate the exact start datetime, end datetime, and duration based on your inputs - and these values will be used as inputs for gantt chart visualization
2. At the top of the template, specify your Project Start Date
3. Test it out with your very first task by entering following values:
- A task name (e.g. 'task 1'), under the Task column
- start date under the Start Date column
- start hour and minute under the sHH and sMM columns
- for Mode A : end hour and minute under the eHH and eMM columns optionally you may specify an end date that's different from start date under the End Date (optional) column
- for Mode B : duration of the task in hour under the Dur(Hr) column At this point you should see the gantt chart visualized on the calendar area
4. Now let's click the [+] button found to the left of the Project Start Date field to expand some of the hidden configurations, and try to change the following values:
- Day start hour and end hour in the Day Start Hour and Day End Hour fields. Then observe the effect in the calendar area --> the display of start and end hours will adjust automatically.
- Weekend days in the Inactive Days field. for examples 'sun,mon'
- ensure the entered text contains no space. Then observe the effect in the calendar area. The columns representing the specified days will be greyed out.
- Set either TRUE or FALSE for the Show Day Color field. Then observe the day labels (e.g. Mon, Tue, Wed, etc.) on the top of the calendar area. This can enhance your schedule with visual cues, but some might find it too much.
- List of holidays in Holiday List field Then observe the effect in the calendar area. The columns representing those holidays will be greyed out.
- List of assignee in Assignee List field. Then check on the drop down for the cell under the Assignee column in the task input table Note: To enhance flexibility, you can enter a task assignee's name even if it doesn't match those listed in the assignee list.
5. Now let's click the [-] button found to the left of the Project Start Date field to collapse the rows of configurations, and try below actions
- Change Interval to 15 / 30 / 60 minutes. Then observe the effect in calendar area --> The calendar precision will adjust accordingly.
- Click the Up/Down arrows for calendar scroll Then observe the effect in calendar area --> You can scroll through the calendar by a day or a week with a single click. (Note: smaller arrows are for 1-day scrolling, larger ones for 7-day scrolling
- for Excel online you may enter the number manually as these arrows button won't work in online version)
Elevate project management with this Hourly Planner Gantt Chart Template. Visualize timelines dynamically, customize with flexible inputs, and stay organized with tailored displays. Streamlined, precise, and user-friendly for optimal productivity.
❓❓ WHY Our Hourly Gantt Chart Template ❓❓
- Dynamic Gantt creation based on start date and time, with flexible input methods
- Effortless assignee management with a dropdown list
- Tailored time display for focused productivity
- Weekend clarity with configurable inactive days
- Configurable holiday list for seamless planning
- Day color visualization for intuitive organization
- Precision intervals: 15, 30, or 60 minutes
- Seamless calendar navigation for easy project oversight
🧑💻👨💻Software Requirement🧑💻👨💻
Microsoft Office 365, 2013, 2016, 2019 for Windows; orMicrosoft Office 365 for MacMicrosoft Office 365 Online
📖📖License📖📖
Please do not resell or put this file up for the public to download
Quick Start Guide
1. Very first step is to choose the template based on your input method preference: Mode A : Choose this mode if you prefer to enter Start time and end time Mode B : Choose this mode if you prefer to enter Start time and durationIn both modes, the template has the formulas that calculate the exact start datetime, end datetime, and duration based on your inputs - and these values will be used as inputs for gantt chart visualization
2. At the top of the template, specify your Project Start Date
3. Test it out with your very first task by entering following values:
- A task name (e.g. 'task 1'), under the Task column
- start date under the Start Date column
- start hour and minute under the sHH and sMM columns
- for Mode A : end hour and minute under the eHH and eMM columns optionally you may specify an end date that's different from start date under the End Date (optional) column
- for Mode B : duration of the task in hour under the Dur(Hr) column At this point you should see the gantt chart visualized on the calendar area
4. Now let's click the [+] button found to the left of the Project Start Date field to expand some of the hidden configurations, and try to change the following values:
- Day start hour and end hour in the Day Start Hour and Day End Hour fields. Then observe the effect in the calendar area --> the display of start and end hours will adjust automatically.
- Weekend days in the Inactive Days field. for examples 'sun,mon'
- ensure the entered text contains no space. Then observe the effect in the calendar area. The columns representing the specified days will be greyed out.
- Set either TRUE or FALSE for the Show Day Color field. Then observe the day labels (e.g. Mon, Tue, Wed, etc.) on the top of the calendar area. This can enhance your schedule with visual cues, but some might find it too much.
- List of holidays in Holiday List field Then observe the effect in the calendar area. The columns representing those holidays will be greyed out.
- List of assignee in Assignee List field. Then check on the drop down for the cell under the Assignee column in the task input table Note: To enhance flexibility, you can enter a task assignee's name even if it doesn't match those listed in the assignee list.
5. Now let's click the [-] button found to the left of the Project Start Date field to collapse the rows of configurations, and try below actions
- Change Interval to 15 / 30 / 60 minutes. Then observe the effect in calendar area --> The calendar precision will adjust accordingly.
- Click the Up/Down arrows for calendar scroll Then observe the effect in calendar area --> You can scroll through the calendar by a day or a week with a single click. (Note: smaller arrows are for 1-day scrolling, larger ones for 7-day scrolling
- for Excel online you may enter the number manually as these arrows button won't work in online version)
This Best Practice includes
1 macro-enabled excel file